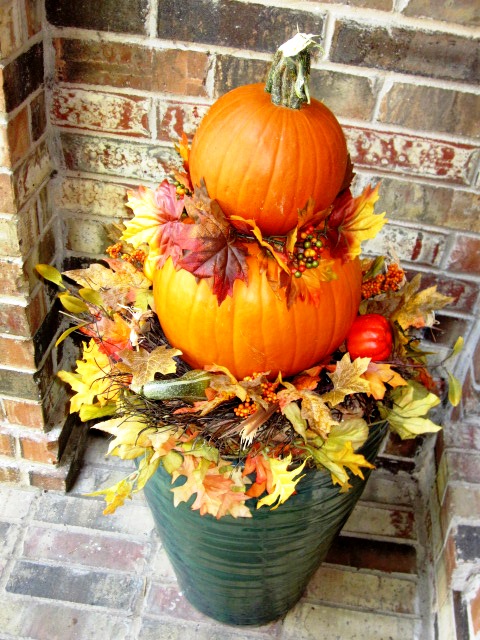
Whether you?re selling a home or dwelling in one, porch appeal is always a plus! So I decided to punch up my own?last?weekend. The weather was great and pumpkins were at Walmart for $3.88 each. But not only because I found cheap pumpkins? It?s my favorite time of year too. I also relish the idea of having passersby enjoy the view of my home on their morning or evening walks. I love looking at my neighbor?s homes as well and what they do and I hope to invigorate and inspire them too.?The same sentiment should be?said about prospective home buyers too.

Pumpkin topiary
Here are the simple steps to create your own pumpkin topiaries too. Here?s what you?ll need:
- 1 or 2 - Pots or urns to place them in (use what you have or purchase new)The ones in the photo were purchased after season this summer at Garden Ridge for 1/2 price. These were $30 each. I had other pots that had broken but I actually used them inside these pots as a foundation for ?lifting? the pumpkins up without having to fill the new pots with anything.
- 1 or 2 ? Large Pumpkins for the base (Walmart $3.88). I measured the opening of the pot & needed 11? in width for the pumpkins to work.
- 1 or 2 ? Small Pumpkins for the top (Walmart .79 cents a pound, these were ?baking? pumpkins on top. I like the stems they had?)
- 1. 5 or 3 ? 6? Fall garlands * Optional (I found mine at Garden Ridge for $8 each & can be re used year after year)
- 1 or 2 Fall Wreaths (Measure the opening of your pot to make sure it won?t fall through but will sit on the edge/lip of the container. These wreaths were found at Walmart for $10 each. I liked them because they had a fan of willow stems as the base and added a layer of texture and dimension to the base)
My total cost (without taking into account the price of the previously purchased pot) was $28 for each container which I anticipate will last through Thanksgiving.
How to create the Pumpkin Topiary:
- If your pot is empty you may want to fill/pack with newspaper or something else to secure the base of the pumpkin once in place. I actually put a broken pot inside my new pot (I layered some newspaper under the broken base of the inserted pot) to shore up the foundation and provide some ?lift?.
-
Place one wreath at the opening of your pot. (I had to pull away/move gently the leaves and the faux gourds on this wreath so the large pumpkin once placed on it wouldn?t be hindered [unstable] by them)
- Place your large pumpkin UPSIDE DOWN on the wreath. (this creates a flat base for the next pumpkin to rest on)
- Wrap one garland (optional*) around the pumpkin on the wreath if needed. I did this to actually cover the lip of the old pot that was sticking up a little from the top of the new pot. But you may not need it!
- Place your small pumpkin, RIGHT SIDE UP on the larger upside down pumpkin
- Cut one garland in 1/2 (you may need wire cutters)
- Wrap 1/2 of garland around the smaller pumpkin on top. You may have to tie it off or use a tie wrap to keep it from coming loose. I simply tied it and lifted the small pumpkin and placed a leaf from the garland under it to secure it once the pumpkin was back in place. They are simply resting on each other, no other tools were needed to prop them up.

?
?****************************************************
 Exceptional Home Staging services for Dallas, Richardson, Plano, Allen, McKinney, Frisco, Carrollton,TX and surrounding cities.
?
?
?
?
?
?
?
?
?
bradley cooper ellen acl doc martin doc martin ohio state university ohio state university
No comments:
Post a Comment
Note: Only a member of this blog may post a comment.